

Before knowing how to integrate SonarQube with SpringBoot, let us understand, What is SonarQube? Why it is required ?
What is SonarQube ?
SonarQube formerly known as Sonar, is an open-source platform developed by SonarSource for continuous inspection of code-quality. To perform automatic reviews with static analysis of code to detect bugs or and code smells of around 29 programming languages.
It performs automated code analysis and provides detailed reports on code quality, code coverage, and various code-related issues, including bugs, vulnerabilities and also about code smells.
Why SonarQube ?
There are many benefits of using the SonarQube database for code quality. If you want to empower developers to write more robust and resilient source code, the SonarQube database can help in the following ways:
Improve quality
Grow developer skills
Continuous quality management
Reduce risk
Tracking issues
Provides Code Quality Metrics
Integration
Integration of SonarQube in SpringBoot applications
Spring boot is a Java based framework that is used to develop web services. It provided many functionalities like Autowire, component scanner, Rest controller, and Microservice environment to develop the web service faster and easier. It also provides stand-alone and production-ready spring applications.
Requirements
JDK > Java 8
Maven > 8.6
SonarScanner
SonarQube
Install and Set Up SonarQube:
Download and install SonarQube on your server or as a Docker container.
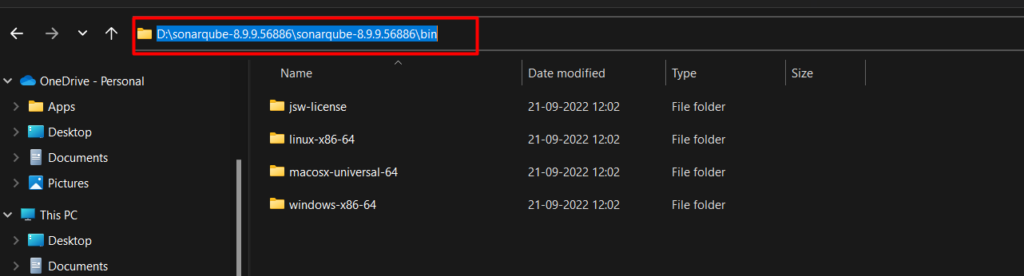
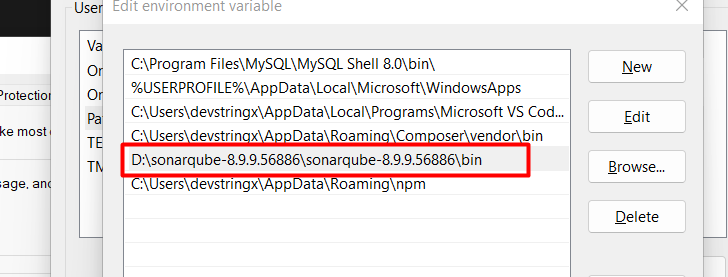
Download Sonar Qube and extract it to a directory. Copy the path of the bin folder and add this also in the env variable.
Add this path to the environment variable
Setup SonarScanner
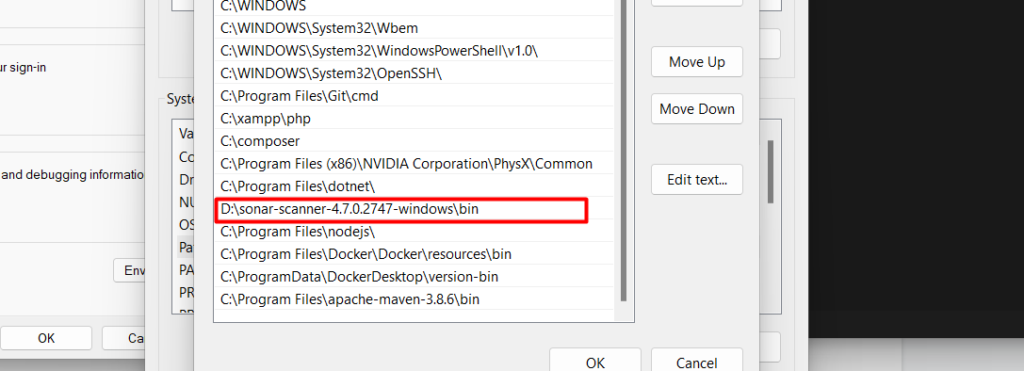
Download the sonar scanner and unzip it and add the path in the environment variable
Now you have completed the setup of a third party application so we can proceed with the spring boot application.
You can find installation instructions on the official SonarQube Website
Start the SonarQube server and access the web interface to configure projects and obtain an authentication token.
Create a Spring Boot Application With Spring Initializr
Add the SonarQube Scanner plugin to your project.
For a Maven-based Spring project, add the following plugin configuration to your pom.xml
    <build>
        <plugins>
            <plugin>
                <groupId>org.sonarsource.scanner.maven</groupId>
                <artifactId>sonar-maven-plugin</artifactId>
                <version>3.9.0.2155</version> <!-- Replace with the latest version -->
            </plugin>
        </plugins>
    </build>
Configure SonarQube properties in your project.
Add a sonar-project.properties file in your project's root directory with the necessary properties, including project key, project name, and SonarQube server URL.
For example:
    sonar.projectKey=my-spring-project
    sonar.projectName=My Spring Project
    sonar.host.url=http://localhost:9000
Create a Project in Sonarqube
After adding the dependencies install the maven dependencies in your application.
Now we will create a project in Sonarqube.
So let’s start the Sonarqube by running the following file in cmd “StartSonar.bat”
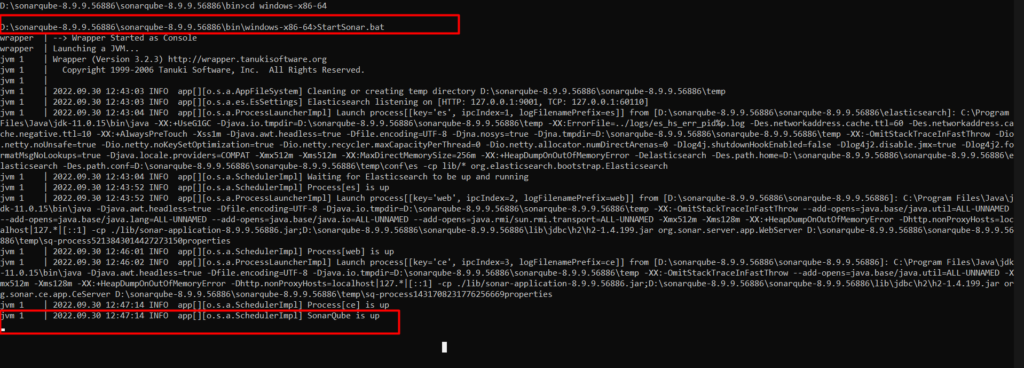
When your sonar Qube up visits this URL in the browser http://localhost:9000/
The first-time password for the sonarqube will be the
Username: admin
Password: admin
Reset this password just after login
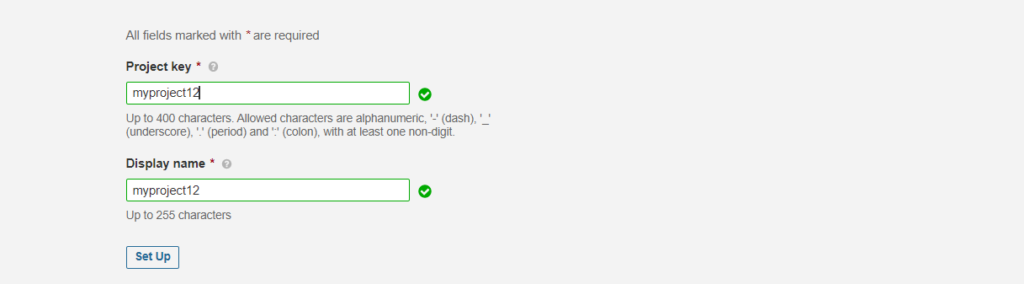
Now create a project
Click on add project and select manually
Add your project name and click setup
Add the project name in the token and click generate

Then click the maven tab and you will see the maven command like below
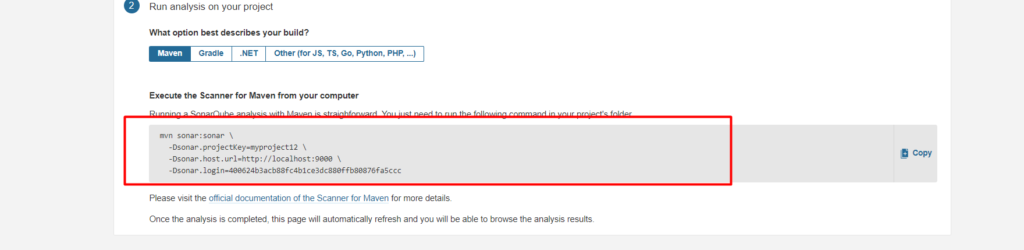
Edit this command and remove the extra line break and forward slash
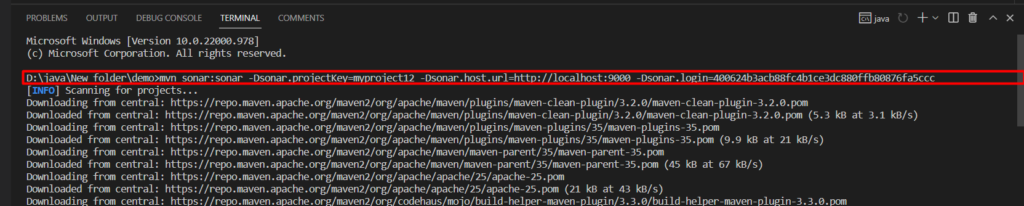
mvn sonar:sonar -Dsonar.projectKey=myproject12 -Dsonar.host.url=http://localhost:9000 -Dsonar.login=400624b3acb88fc4b1ce3dc880ffb80876fa5cccRun the command in cmd at the root of your project

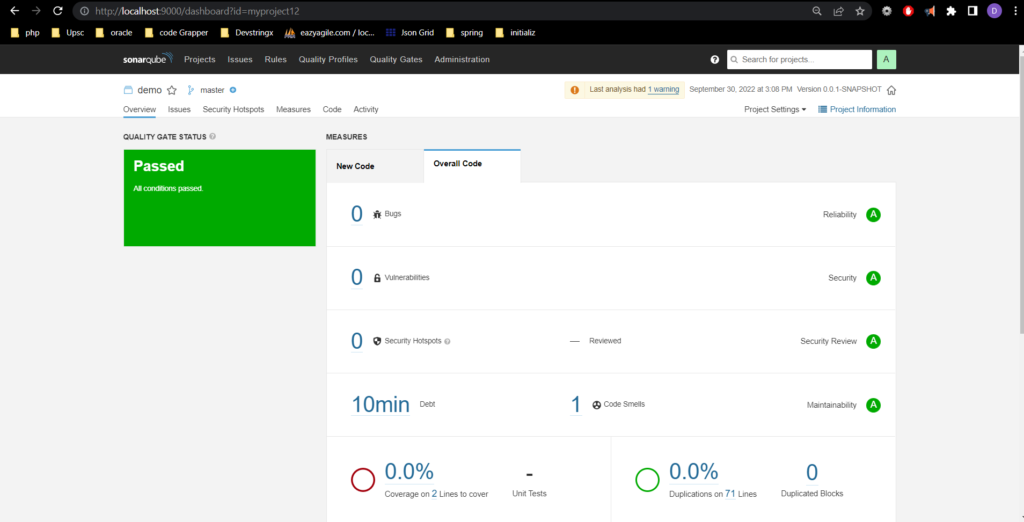
Now refresh the sonar dashboard
You can also run using SonarQube Analysis Command:
Execute the SonarQube analysis by running the following command in your project’s directory:
mvn sonar:sonarReplace mvn with gradle if you are using Gradle for your project.
View SonarQube Reports:
Access the SonarQube web interface using localhost:9000
to view detailed code analysis reports for your Spring project.
Set Up Continuous Integration:
- Configure your CI/CD pipeline (e.g., Jenkins, Travis CI, GitLab CI) to automatically run SonarQube analysis on code commits and pull requests.
I hope this article is helpful. Thank you for reading the article. Please like, share and comment. it will encourage me to write more such articles. Do share your valuable suggestions, I appreciate your honest feedback!!!