


As we all know in the current technological world, everyone should know everything. It will start from Frontend technologies, Backend tech stacks, Devops and followed by Cloud Computing. So keeping thought of we are good in Frontend and Backend technical skills. Let us drive to - HOW TO SETUP A CONTINUOUS INTEGRATION & DELIVERY (CI/CD) PIPELINE.
In this article, we will learn about the below concepts of Continuous Integration and Delivery Pipeline.
Definition of CI/CD Pipeline
Stages of CI/CD Pipeline
Examples of Continuous Integration and Delivery
How to set up a Jenkins Pipeline
Moving on to the first topic,
What is CI/CD Pipeline?
The primary goal of the CI/CD pipeline is to automate the process of SDLC [Software Development Lifecycle]. The pipeline will cover many aspects of the SDLC process starting from writing code and running test cases to delivery and deployment.
The CI/CD pipeline integrates, automation and continuous monitoring into the development cycle.
This kind of pipeline, which encompasses all the stages of the software development life cycle and connects each stage, is called as CI/CD Pipeline.
Stages In CI/CD Pipeline:
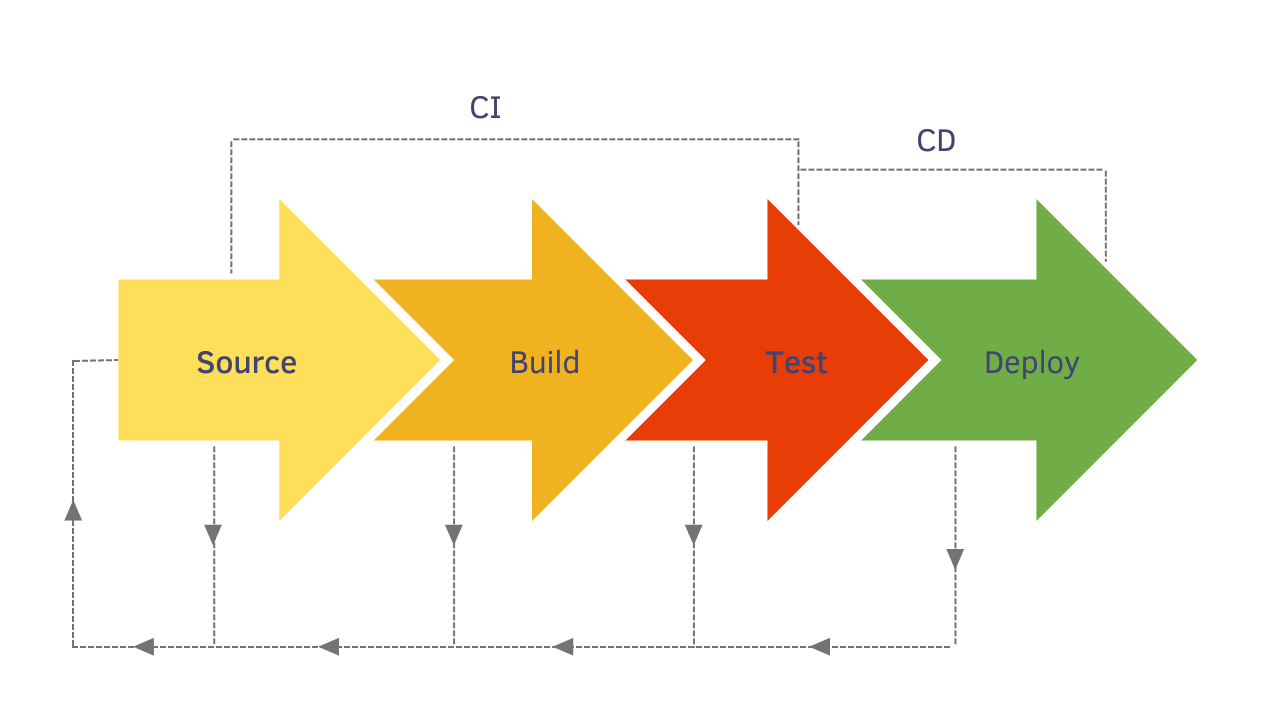
A CI/CD pipeline can be divided into four main stages:
Source
Build
Test
Deployment
Source:
The source stage is the first stage of the CI/CD Pipeline. In this stage, the pipeline will get triggered, by any change/commit in the program/preconfigured data in the code repository.
Common Tools used in the Source stage are, GIT, SVN, Azure Repo, AWS CodeComit
Build:
The build is the second stage of the process, here it combines the source code with all its dependencies into an executable/runnable instance
It covers Software Builds like Docker containers. Tools that support the build stage are - Gradle, Jenkins, Travis CI, Azure Pipeline and AWS Code Build.
Test Stage:
The test stage incorporates, all the automated testing to validate the behavior of the software. The main goal of this stage is to prevent software bugs before reaching the end-users.
Common test tools used are: Selenium, Appium, Jest, PhpUnit, Puppeteer, Playwright
Deploy Stage:
This is the final stage of the pipeline. After passing all the above stages, the package is now ready to be deployed.
The deployment stage can include configuration, and containerization using technologies like Docker, Terraform Puppet and Kubernetes.
Other tools include Ansible, Chef, AWS Code Deploy, Azure Pipeline and AWS Elastic Beanstalk.
How to set up CI/CD Pipeline using Jenkins
In this section let us see, how to configure CI/CD pipeline using Jenkins:
Before you start configuring make sure, Jenkins is properly configured with the required dependencies.
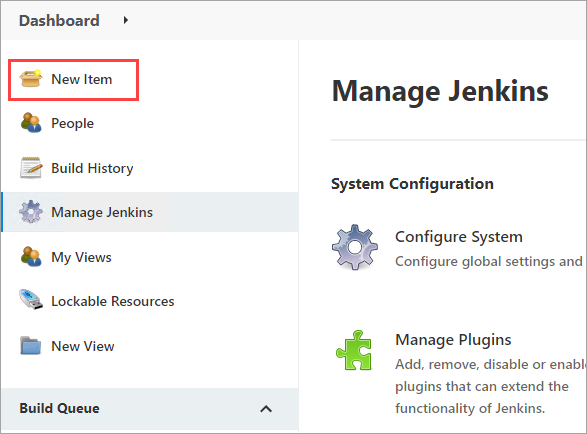
Step 1: Opening Jenkins
Login to Jenkins and click on New Item
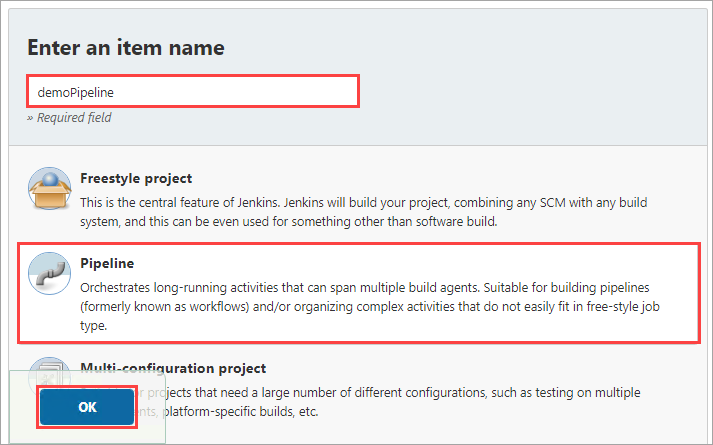
Step 2: Naming the Pipeline
Select the pipeline option from the menu, provide a name for the pipeline and click OK
Step 3: Configuring the Pipeline
We can configure the pipeline in the pipeline configuration screen. The most important section is the Pipeline Definition section, where we can define the stages of the pipeline. Pipeline supports both declarative and scripted syntaxes. (Refer to the official Jenkins documentation for more detail.)
Let us use the simple Hello World example:
pipeline {
    agent any
      stages {
         stage('Hello') {
                steps {
                    echo 'Hello World'
                    }
               }
           }
        }
Step 4: Executing the Pipeline
Click on Build Now to execute the pipeline
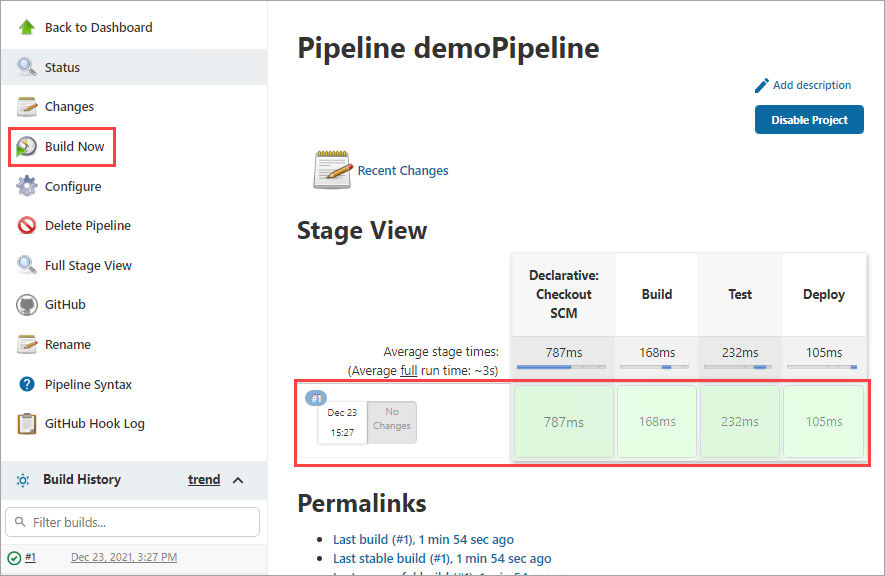
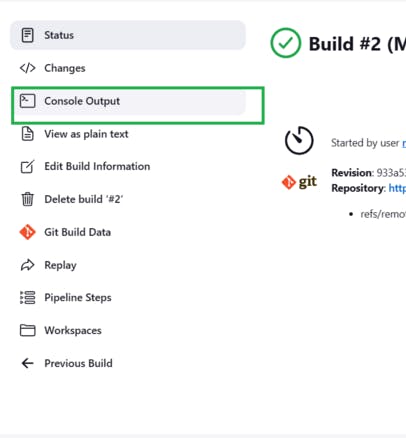
The pipeline stages getting executed and the result getting displayed in the Stage View section. We can verify that the pipeline has been successfully executed by checking the console output for the build process
Step 5: Expanding the pipeline definition
Let's expand the pipeline by adding two more stages to the pipeline. For that, click on the "Configure" option and change the pipeline definition according to the following code block.
pipeline {
 agent any
         stages {
             stage('Stage #1') {
             steps {
             echo 'Hello World'
             sleep 10
             echo 'This is the First Stage'
         }
     }
         stage('Stage #2') {
             steps {
             echo 'This is the Second Stage'
             }
         }
         stage('Stage #3') {
             steps {
             echo 'This is the Third Stage'
             }
         }
     }
}
Save the changes and click on “Build Now” to execute the new pipeline. After successful execution, we can see each new stage in the Stage view. Console logs verify that the code was executed as expected.
Step 6: Visualizing the pipeline
We can use the "Pipeline timeline" plugin for better visualization of pipeline stages. Simply install the plugin, and inside the build stage, you will find an option called "Build timeline." Click on that option, and you will be presented with a timeline of the pipeline events, as shown below
I hope this article is helpful on CI/CD Pipeline.
Thank you for reading the article. Please like, share and comment. it will encourage me to write more such articles. Do share your valuable suggestions, I appreciate your honest feedback!!!