


If you are a Java Developer your day-to-day activities while working on your project include - Writing the code, Compiling the code, Testing the code, Packaging it in the form of an artifact like a jar or war file and then deploying this artifact to a web server.
There are a lot of tasks you have to take care of manually and obviously, you can automate these tasks using a library called Apache Maven
In this article, we will understand what is Apache Maven and how you can use it effectively to build and manage your Java projects
First, let us understand the fundamentals of Maven
What is Maven?
Maven is a project management tool that is developed to help, manage projects which are developed using JVM languages like Java, and Scala. The major task of project management tools include,
Building the source code
Testing the source code
Packaging into jar, war or ear
Generating java docs
Manage dependencies
For this reason, maven is also called a Build Tool or Dependency Management too
Now, let's proceed further and see how to install Maven on our machine.
Open the https://maven.apache.org/ in your browser
Go to the download section and download the latest Maven version zip folder and extract it
Set the environment path variable Add JAVA_HOME and MAVEN_HOME
Add the maven path in the environment variable. ex: F:\apache-maven-3.6.3-bin\apache-maven-3.6.3\bin
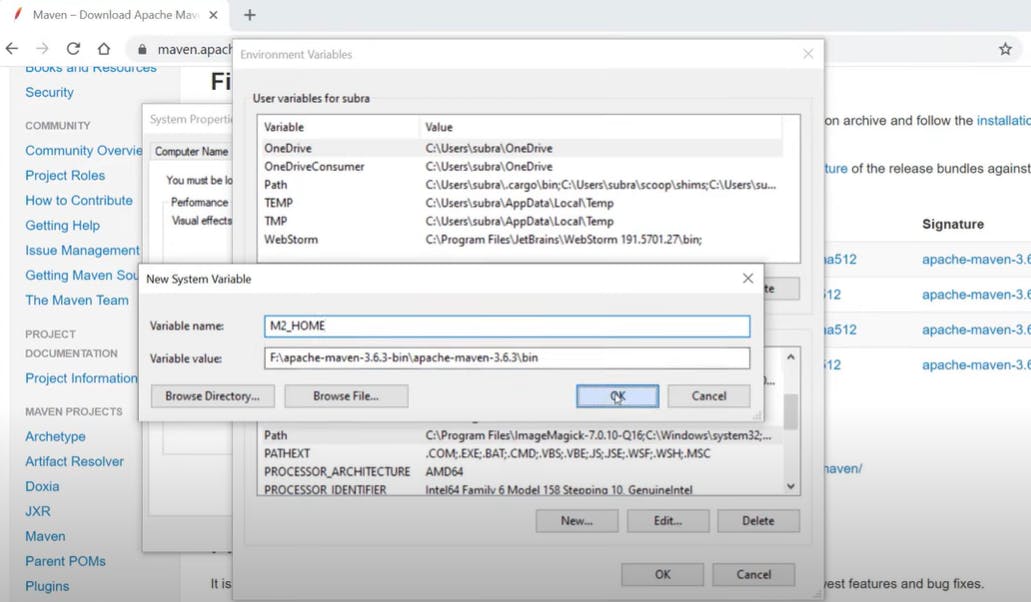
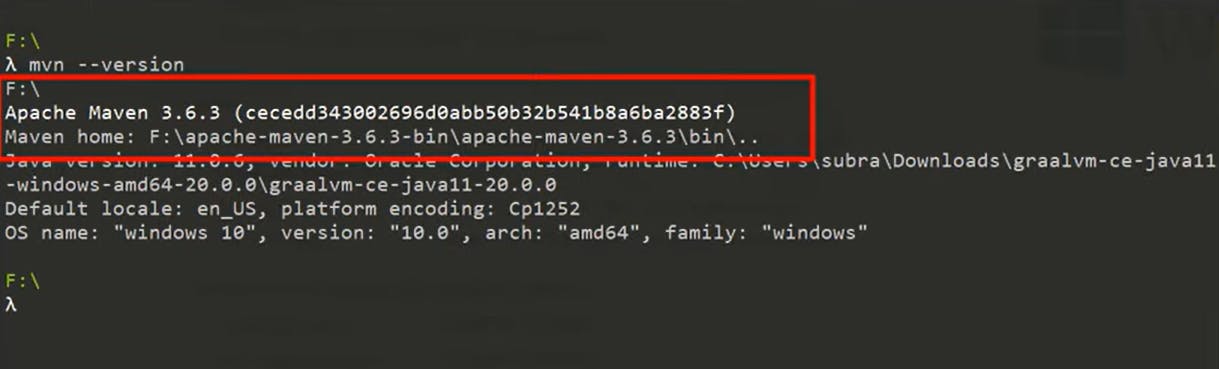
Then verify the maven version
Maven Repository:
Maven Repository is a directory of packaged jar files with pom.xml. Maven searches for dependencies in the repositories. There are three types of maven repositories.
Local Repository
Central Repository
Remote Repository
Local Repository: When we create a Maven Project, all the dependencies will get downloaded into the .m2 folder of the local machine. It is located in your local system. By default, the maven local repository is the %USER_HOME%/.m2 directory.
Also, we can change the location of the local repository in the settings.xml file, which is located in MAVEN_HOME/conf/settings.xml Example: E:\apache-maven-3.1.1\conf\settings.xml
<settings xmlns="http://maven.apache.org/SETTINGS/1.0.0"
   xmlns:xsi="http://www.w3.org/2001/XMLSchema-instance"
   xsi:schemaLocation="http://maven.apache.org/SETTINGS/1.0.0 http://maven.apache.org/xsd/settings-1.0.0.xsd">
  <!-- localRepository
   | The path to the local repository maven will use to store artifacts.
   |
   | Default: ${user.home}/.m2/repository
  <localRepository>/path/to/local/repo</localRepository>
  -->
</settings>
Now change the path to the local repository.
<settings xmlns="http://maven.apache.org/SETTINGS/1.0.0"
   xmlns:xsi="http://www.w3.org/2001/XMLSchema-instance"
   xsi:schemaLocation="http://maven.apache.org/SETTINGS/1.0.0 http://maven.apache.org/xsd/settings-1.0.0.xsd">
   <localRepository>e:/mavenlocalrepository</localRepository>
</settings>
Maven Central Repository: Maven Central Repository is located on the web. It has been created by the apache maven community itself. The path of the central repository is http://repo1.maven.org/maven2/
The central repository contains a lot of common libraries that can be viewed by this URL http://search.maven.org/#browse.
Maven Remote Repository: Maven remote repository is located on the web. Some of the libraries can be missing from the central repository such as the JBoss library etc, so we need to define a remote repository in the pom.xml file.
Maven Project structure:
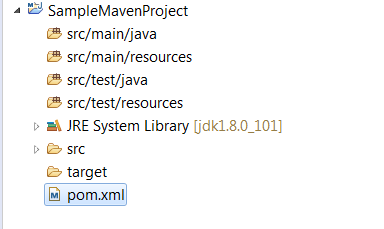
Now let us understand the Maven project structure. When you create a maven project, you will see a folder called
src - source - which is the root of our application source code and the application unit test
src/main/java - which contains the source code of our application, all the production code we write to our application is inside this folder
src/main/resources - where we store all the static files, we use in our project. example application.properties, XML files, CSV files etc
If you are developing a web application, then all the html, and javascript files will come under this folder
src/test/java - here, where we write the unit test, and integration test for our application
pom.xml - it contains the metadata of project dependencies
target - in this folder maven stores all the compiled java class files
POM - Project Object Model
POM contains the metadata of the project and is also responsible to manage the dependencies to configure plugins which helps us in automating many repetitive tasks, here is the basic pom.xml
<project xmlns="http://maven.apache.org/POM/4.0.0"
xmlns:xsi="http://www.w3.org/2001/XMLSchema-instance"
  xsi:schemaLocation="http://maven.apache.org/POM/4.0.0
http://maven.apache.org/xsd/maven-4.0.0.xsd">

  <modelVersion>4.0.0</modelVersion>
  <groupId>com.maven.application</groupId>
  <artifactId>my-app</artifactId>
  <version>1</version>
</project>
we have <project> - which is the parent tag of the pom.xml file
model version - model version will always be set to 4.0.0 unless you change it to another maven version. For example higher versions above 3.0
Types of pom files:
Simple pom file
Super pom file
Effective pom file
Simple pom file: the simple pom file contains the basic details which are explained above. Which is generated while creating a maven project which contains information relevant to the project
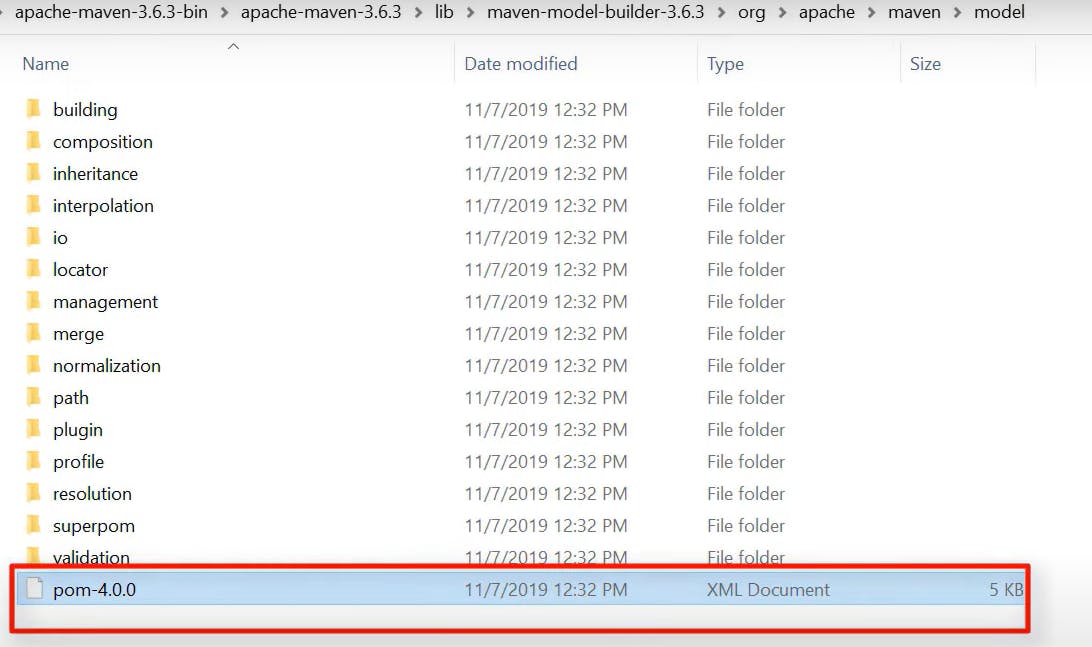
Super pom file: You can find the super pom file in the maven installation directory, under the path lib. And inside the jar file - maven-model-builder, we can find a package named org
Effective pom file: Effective pom file is nothing but a combination of simple pom and super pom files. It is just a way of checking all the information of the pom.xml files just in one place. To have a look into the effective pom file, go to maven terminal type
mvn-help: effective-pom
Maven Core dependencies
Maven has two types of dependencies
Snapshot dependency: a snapshot dependency means a project that is under active development and which is unstable.
Release dependency: once the project is completed then it is released
Scopes of Maven dependencies:
We can control the visibility of maven dependency using dependency scopes. There are 5 types of scopes
Compile: This is the default scope for all dependencies and the dependencies marked with compile are available inside the classpath of the project
Provided: a dependency which provided scope will be provided at the run time either by jdk or the web server
Runtime: as the name suggests the dependency marked with runtime is available only at runtime but not at compile time.
Test: these dependencies are only available at the time of writing and executing the test.
Systems scope: this is similar to provided scope but the only difference is we explicitly mentioned where we can find the dependency in the system. Instead of JDK or web server providing this dependency at runtime, we provide the system path where maven can find this dependency. We can provide the path using the system path
Maven Build Lifecycle:
The Maven build lifecycle is divided into 3 different steps:
Default - as part of this step maven performs a lot of tasks,
maven reads the pom.xml and validates whether we have valid xml or not.
Then maven will compile our source code and create the class files and store them in the target folder.
Then in the test phase, as part of the test, maven runs the unit test inside the project.
package - as part of the package, maven packages the source code into an artifact of our choice like jar or war or ear or zip files
integration test - if our project contains any integration tests and is executed
verify - maven checks the integration test, which runs in the previous phase is successful or not
install - maven will install the created package into the local repository
deploy - after the installation maven will deploy into a remote repository.
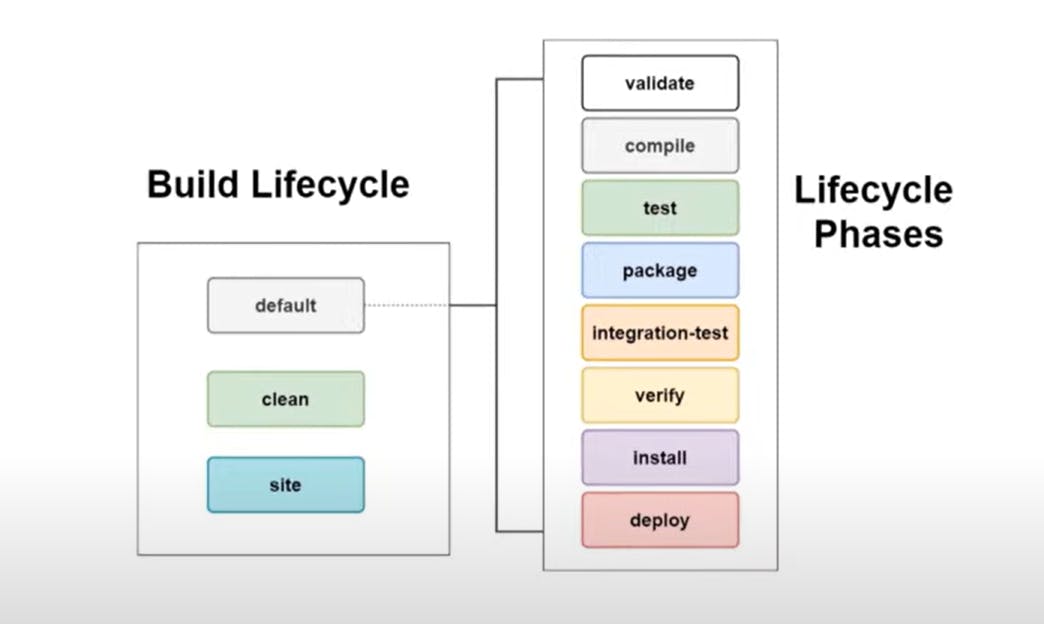
These phases are inclusive of each other, so if we run compile, then implicitly we are also running, validate. If you are running a test, then we are running, validating, compiling and test
2. Clean: this step is mainly responsible to clean the compiled java classes or the generated metadata. Example: mvn clean install
3. Site: This is responsible to generate java documentation that is present inside our project.
Maven simplifies the build process in much advanced way. I hope you learned and got some points to understand about Apache Maven.
And Thank you for reading the article. Please like, share and comment. it will encourage me to write more such articles. Do share your valuable suggestions, I appreciate your honest feedback!!!