


![Beginners Guide to AWS - Virtual Private Cloud [VPC]](https://cdn.hashnode.com/res/hashnode/image/upload/v1641795363568/q5gl39vws.png?w=1600&h=840&fit=crop&crop=entropy&auto=compress,format&format=webp)
Hey Reader!!!!
You're here and you want to know more about the technical concepts.
Contents of the blog include:
- Steps to Create Virtual Private Cloud [VPC] in Amazon Web Service
The following sections demonstrate how to create and configure a VPC for use with AWS Directory Service.
Create a new VPC
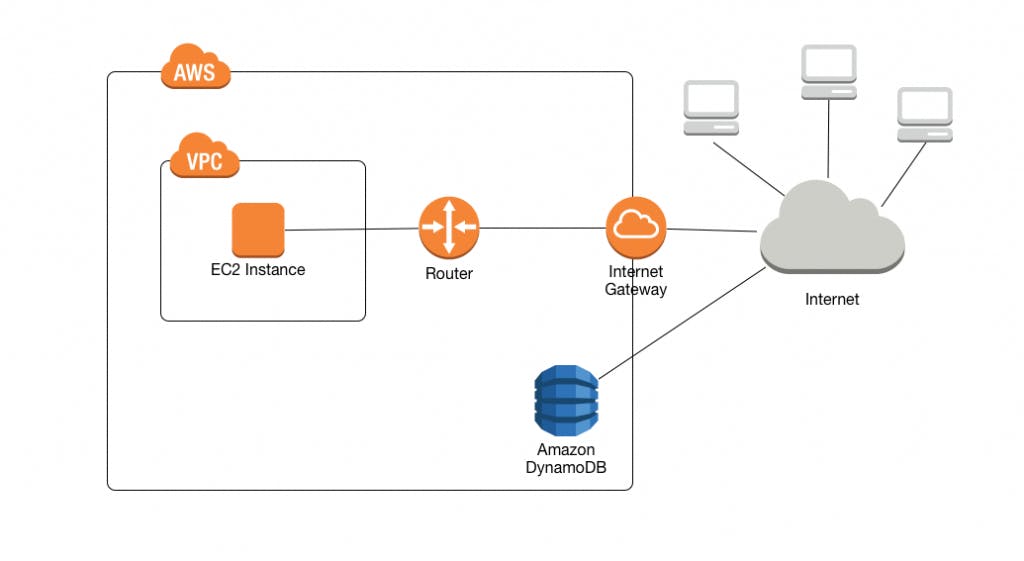
This tutorial uses one of the VPC creation wizards to create the following:
- The VPC
- One of the subnets
- An Internet gateway
To create your VPC using the VPC wizard
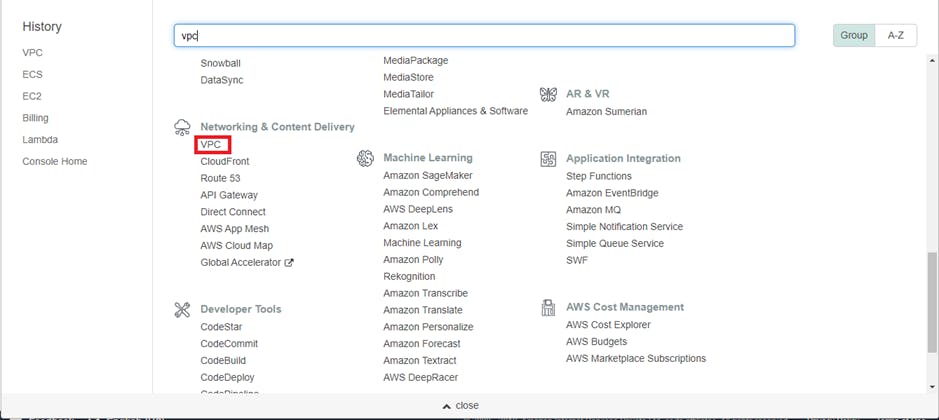
Open the Amazon VPC console at console.aws.amazon.com/vpc
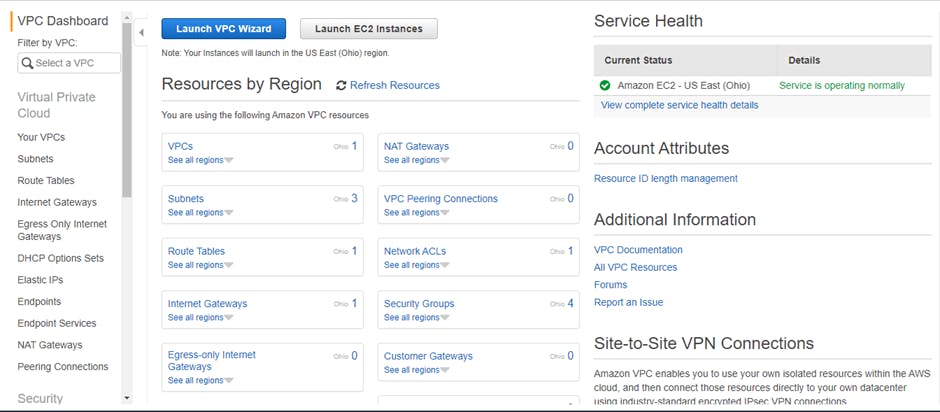
In the navigation pane, click VPC Dashboard. If you do not already have any VPC resources, locate the Your Virtual Private Cloud area of the dashboard and click Get started creating a VPC. Otherwise, click Start VPC Wizard.
Select VPC service from AWS console
- Welcome console will look as below
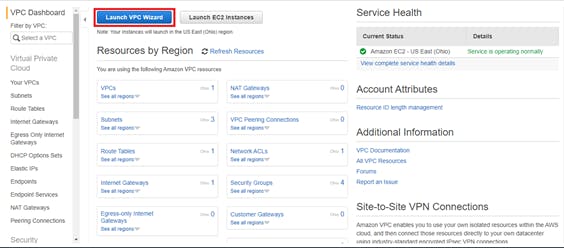
- Click on Launch VPC Wizard
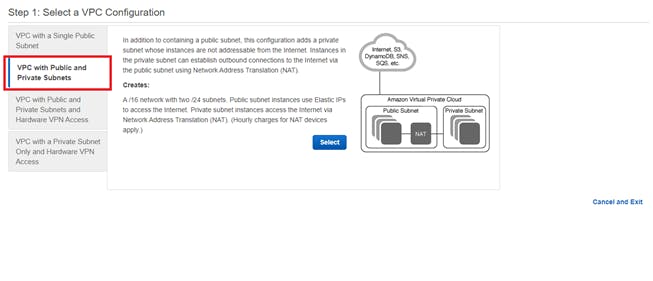
- Select “VPC with Public and Private Subnets” and click “Select”
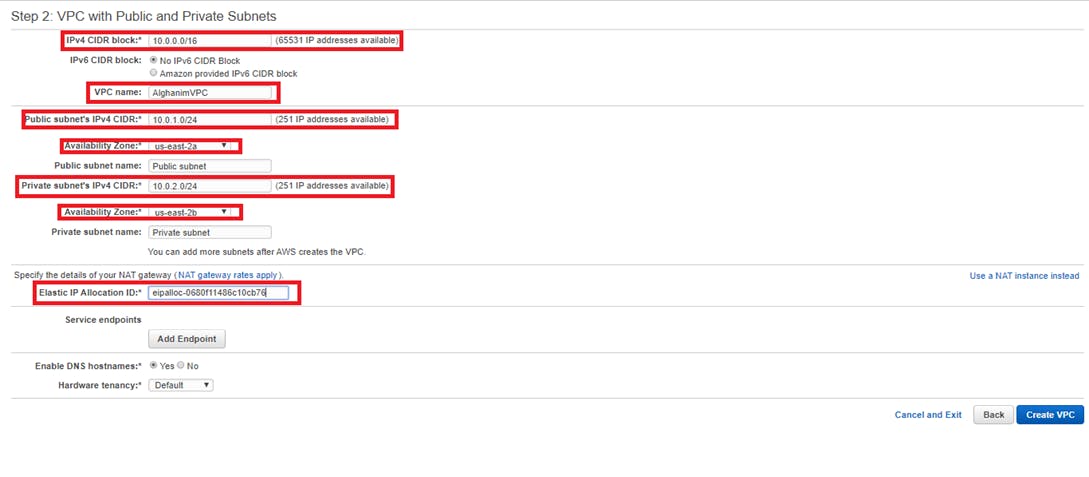
- Provide VPC name, valid CIDR range for Public and Private subnets. Select availability zones for Public and private subnets [as per standards public and private should be in different availability zones]. Provide elastic IP for NAT gateway After keying the details click on “Create VPC
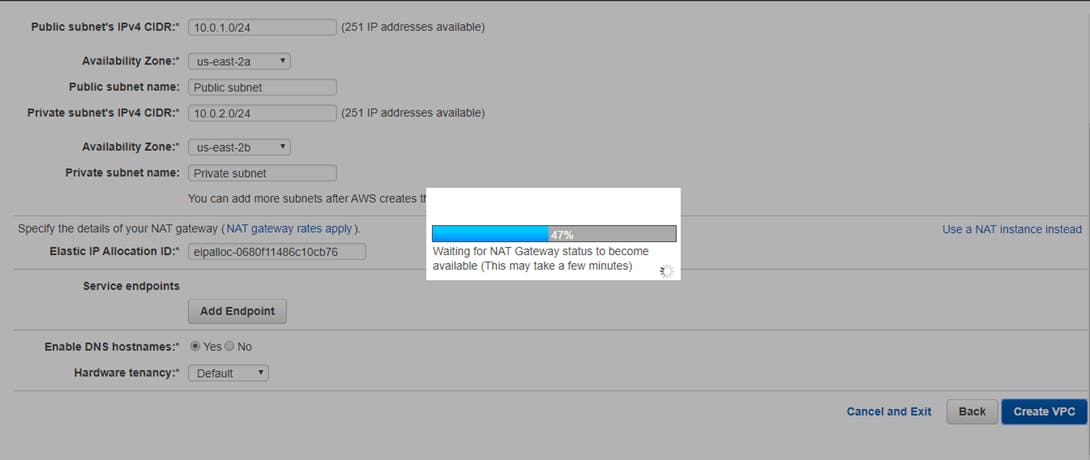

- On click of “OK”, the list will be displayed as below

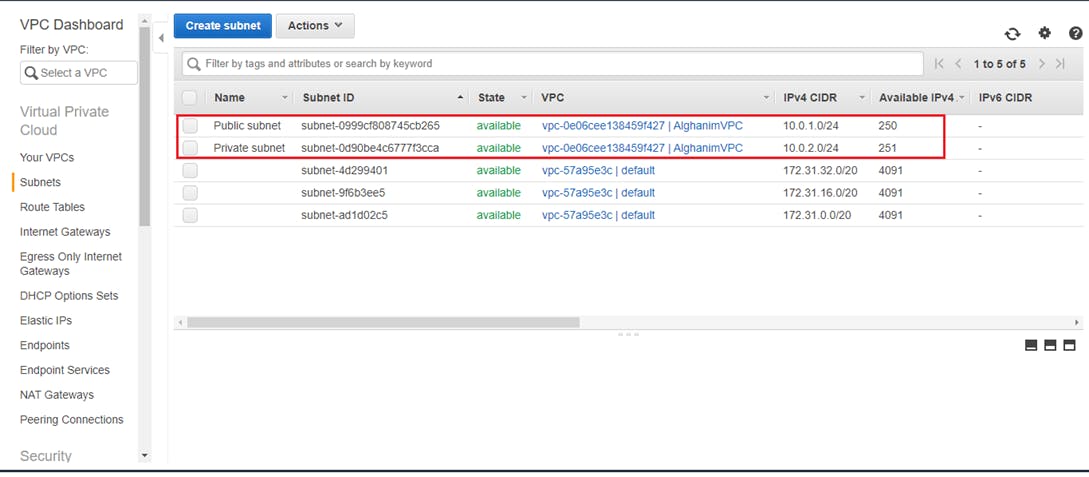
- After successful creation of VPC, Subnets, Route Tables and Internet Gateway will be created automatically

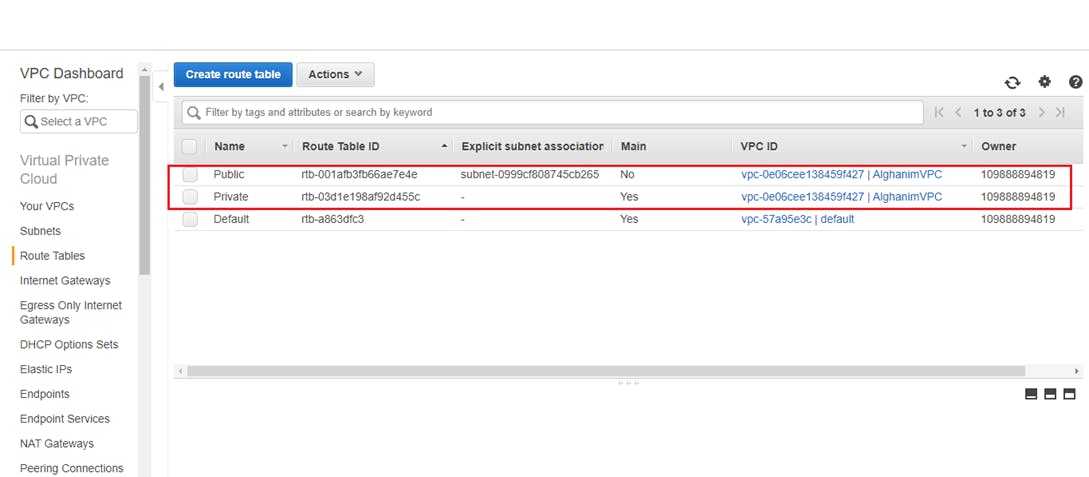
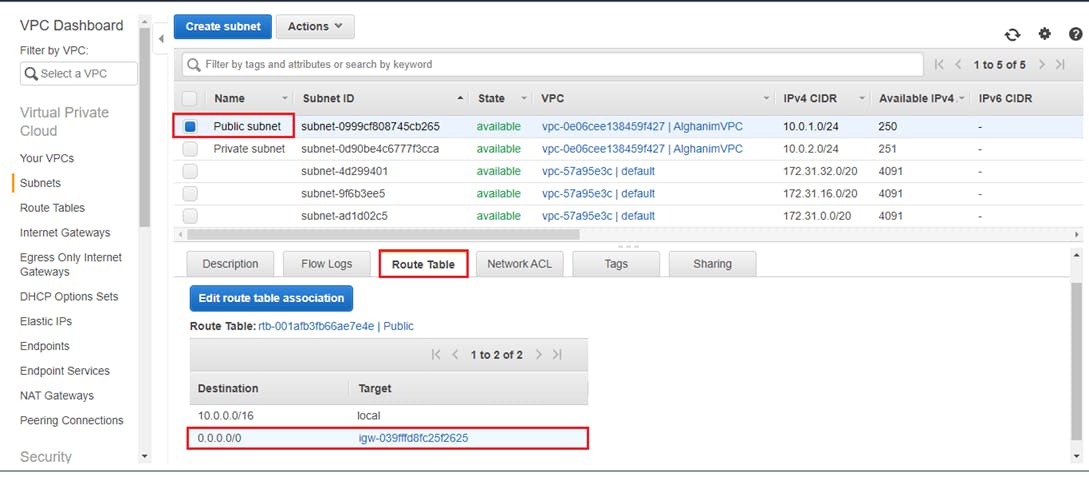
- Verify Public subnet route configuration is open for Public access. In order to have public access the CIDR must be 0.0.0.0/0 and Target should be Internet Gateway. Each VPC should have only 1 Internet gateway.
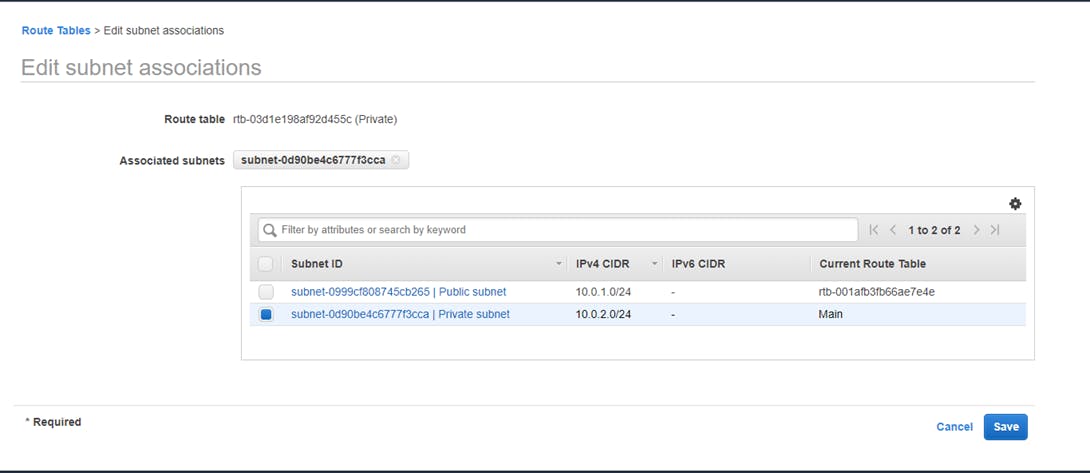
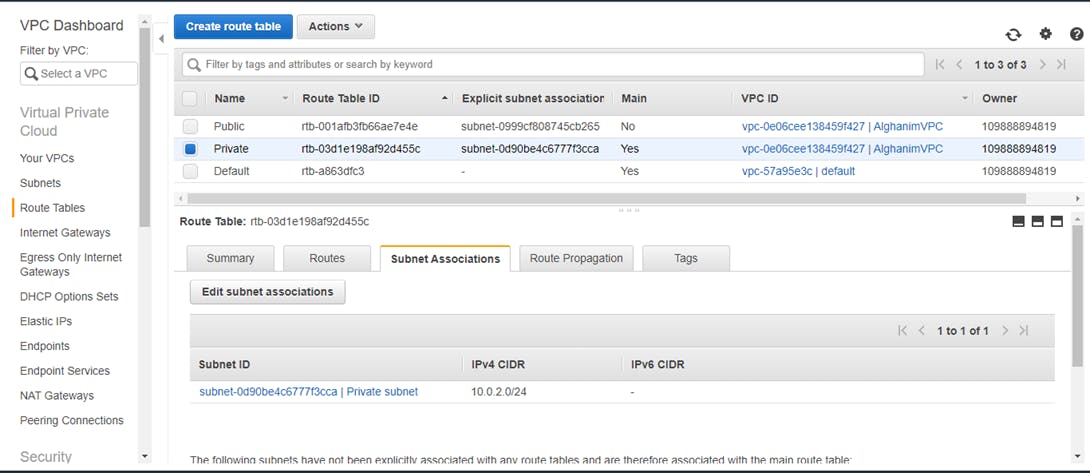
- Navigate to “Route tables“ and associate Public subnet -> Public route and Private Subnet -> Private route
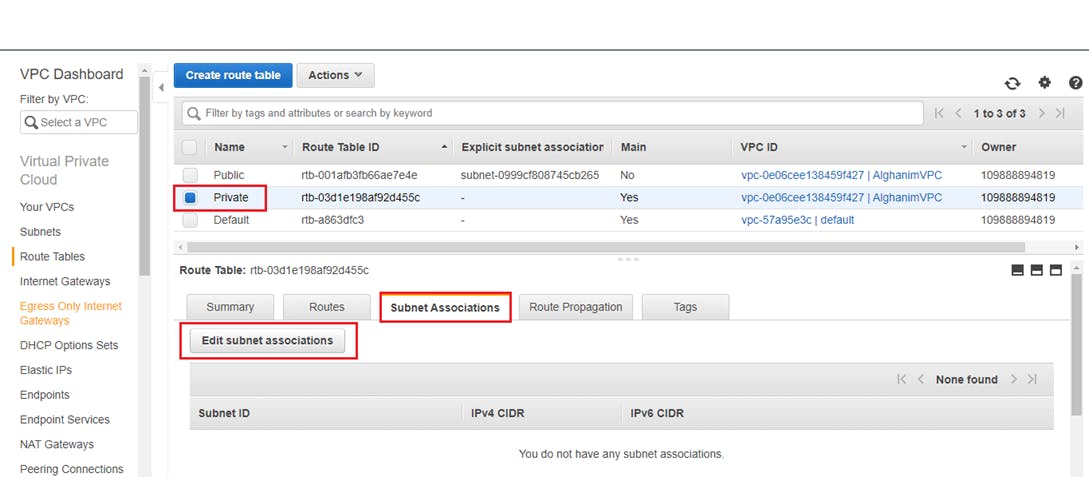
Route Table displayed as “Main” must be mapped to Private subnet
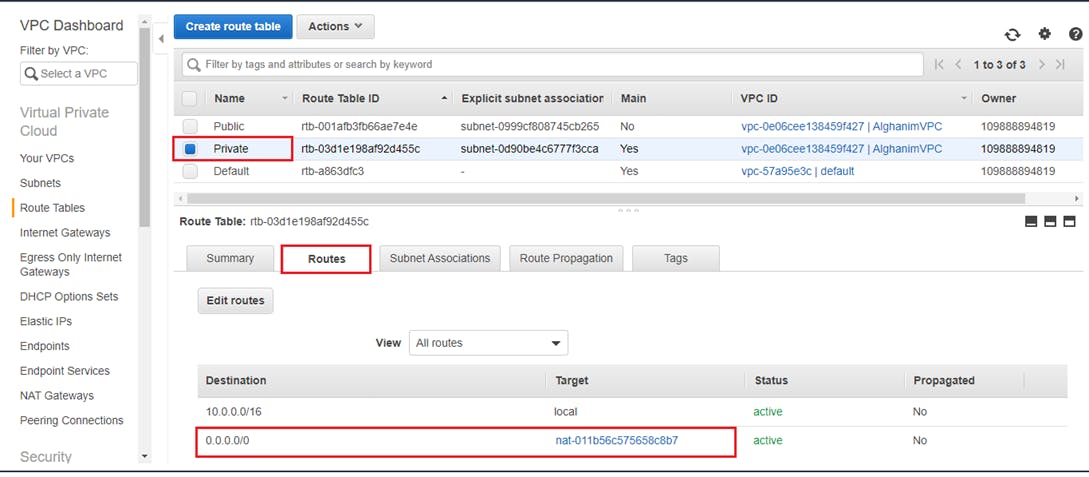
- Private route tables route config has NAT gateway configured which helps Private EC2 to access Internet for only outbound traffic
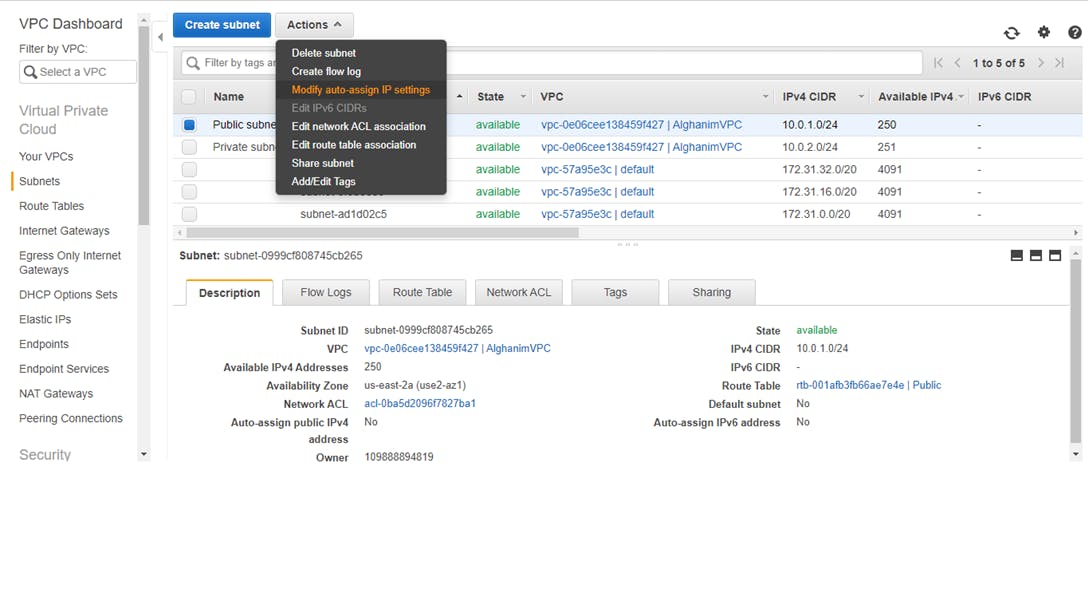
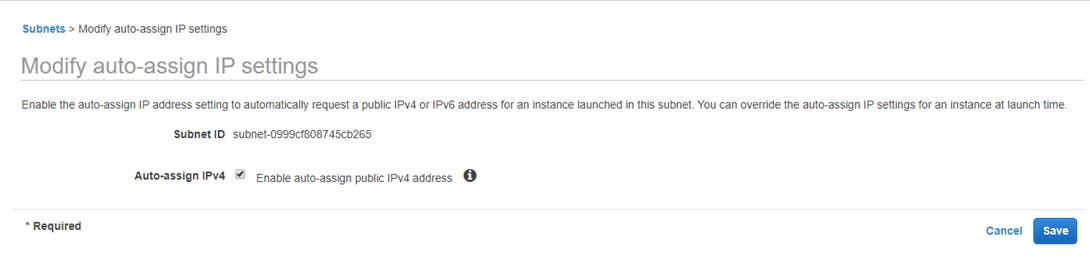
- Enable Auto assign IP for Public subnet in order to allocate public IPs for Instances launched in Public subnet. This IP can be still overridden by providing Elastic IPs.
Thank you for reading, Please like the article, It will encourage me to write more such articles. Do share your valuable suggestions, I appreciate your honest feedback!!